Friday, February 21, 2014

how to change number of downloaded records in OBIEE11g


Step 1: login to Enterprise Manger and Go to Business Intelligence -> Core Application then click on Lock and Edit configuration tab

Step 2:  Go to Capacity Management -> Performance
Here we can see lot of performance options 

While installing the OBIEE, Default Maximum number of records downloaded is set to 2500 records. Change the number of records as per requirement  

Example:  Here we are changing downloaded records as 3000   
 
Step 3: Click on Activate Changes and Click on Restart to apply recent changes link.


Sunday, February 16, 2014

How to create users and groups in OBIEE11g

Use console link to create user/group in OBIEE11g

1.       Go to console link ( http://localhost:portnumber/console ) and provide the credentials to login.Once logged into the console link click on the Security Realms link which is appeared in the left side pane

2.       Click on the  Myrealm

3.       Go to the Users and Group tab then select the user in below tab and click on new button
4.       Give the below information
User Name, Password and Confirm Password
Example: Here we are created user with name of mark0099
User is created and we can see the user in users list
5.       To create group select Group tab and click New button then create Group
6.       Assigned Group to user
                                 a. Click on the user  then go to the Groups tab
                b. Move the Group from left side to right side using the arrow and click on the save button


Monday, February 10, 2014

Security in OBIEE 11g


In 10g we are having Users and Groups as part of security but in OBIEE11g Application roles are newly added feature

OBIEE10g -> (Users, Groups)
OBIEE11g -> (Users, Groups, Application roles)

Default Application roles in OBIEE 11g
3 main default Application roles
BIAdministrator
                BIAuthor
BIConsumer  

BIAdministrator : BI Administrator can change the OBIEE Installation configure and implicitly granted the BIAuthor and BIConsumer roles
BIAuthor:  has permissions to create and edit content for other users and implicitly added BIConsumer role

BIConsumer: By default every user is part of the BIConsumers groups


Sunday, December 29, 2013

How to stop forcefully running Scheduler in OBIEE10g (disabled Restart Option in OBIEE10g Scheduler)

Issue: disabled restart option in BI Schedule

Solution: Go to command prompt and use the below scripts to stop the services forcely then we can see the restart link as enabled
                 1. Go to command prompt and type “taskkill /IM NQSServer.exe” script in command then we can find the task PID number
               2. Use “taskkill /f /PID PIDNumber” script to stop task forcely .

   Example:  Here 5940 is the PID number
If the task is completely killed then you can see the message as “SUCCESS: The process with PID PIDNumber has been Terminated.”
3. In above we have stopped the BI Server, like we can stop the BI Scheduler like as in the below screen shots.
Then Restart option will enabled

Sunday, November 17, 2013

No log found in OBIEE11g


1.       Open Repository and Go to Tools -> Options then set log level  “2”
we will get below option window then go to the "Repository" tab and set log level.
2.       Go to -> Manage ->  Identity Manager  and check the log level for user


Opatch failed with error code = 41

If Opatch failed with error code = 41 issues while applying the OBIEE 11.1.1.7.1 patch on OBIEE 11.1.1.7.0
 
Solution: Close all the URLS which is related to this application and Stop BI Services Manually by using  Start Menu  -> Stop BI Server and try patching again


Monday, October 28, 2013

Patch Failed with Error Code = 73

Error Code 73 while doing the patch  
 
Solution: Commands should run as Administrator. So, go to the Start Menu and right click on the cmd and select cmd as Administrator
 
Close the existed cmd window and open the cmd window by run as Administartor and then start patch process from scratch(Set Variables, running JavaScripts and applying patch)


‘Opatch’ is not recognized as an internal or external command

If we are getting any errors like as shown in the below, we had set the variables wrongly. So, We need set the Variables correctly  (i.e, Path should be correct)

 
Our correct path is “E:\Middleware\Oracle_BI1” but we used wrong path in above command prompt “E:\Middleware_folder\Oracle_BI1”. So, we got the error like ‘optach’ is not recognized.

run below scripts by correcting the path


set ORACLE_HOME=E:\Middleware\Oracle_BI1
and then execute the below javascripts
set PATH=%ORACLE_HOME%\bin;%PATH%
set JAVA_HOME=%ORACLE_HOME%\jdk
set PATH=%JAVA_HOME%\bin;%PATH%
set PATH=%ORACLE_HOME%\OPatch;%PATH%


all the above scripts are ran successfully then apply the patch.

If the patch got succeed then we will get message like "opatch succeeded" 


Sunday, October 27, 2013

Applying OBIEE 11.1.1.7.1 patch on OBIEE 11.1.1.7.0


Step 1: Extract 6 files into E:\Middleware\Oracle_BI1 path
Step 2: Stop all the Servers and components ( Stop all components using Enterprise Manager, Shut down BI server and Admin Server using console)
Step 3: Apply Patch one by one on 6 extracted files (16453010, 16842070, 16849017, 16850553, 16869578, 16916026)


Step 1:
Extract p16556157_111170_MSWIN-x86-64 file
 
Open p16556157_111170_MSWIN-x86-64 extracted file and again extract the below 6 files in E:\Middleware\Oracle_BI1 folder one by one
1.      BIFNDN_11_1_1_7_0_WINDOWS_X64_130605_1300_16842070
2.      BIFNDNEPM_11_1_1_7_0_WINDOWS_X64_130606_1421_16916026
3.      BIINST_11_1_1_7_0_GENERIC_130423_1920_16453010
4.      BIPUBLISHER_11_1_1_7_0_GENERIC_130607_0438_16849017
5.      BISERVER_11_1_1_7_0_WINDOWS_X64_130531_2306_16850553
6.      BISHIPHOME_11_1_1_7_0OBIEEBP_GENERIC_130607_1544_16869578

  
In Middleware folder we can see 6 extracted files after we extracted above 6 files like as in the below screen shot.
Open 16453010 file and read READ.HTML document for patching instruction in Section 5


Step 2:  
1. Stop all the components using Enterprise Manager
 
       Login to the Enterprise Manager and Goto -> Business Intelligence -> Core Application -> Availability path and Stop all the Services using STOP ALL option as shown in the below screen.
 2.      Go to console link and shut down the BI Server
We can get a message like as shown in the below screen
3.      stop the Admin Server using below screen

Then we will get the below screen if everything is stopped.

Step 3: Run the below scripts in Command to set the variables and apply patch for 6 files to patch.

set ORACLE_HOME=Installation drive:\Middleware\Oracle_BI1
set PATH=%ORACLE_HOME%\bin;%PATH%
set JAVA_HOME=%ORACLE_HOME%\jdk
set PATH=%JAVA_HOME%\bin;%PATH%
set PATH=%ORACLE_HOME%\OPatch;%PATH%
 
Open Command Prompt as Administrator then go to BI Installation Drive
Suppose here we have installed in “E” drive. So, we are moving to E drive in Command prompt
Go to Oracle_BI1 folder in Middleware using command
Run below scripts as shown in the below screen
set ORACLE_HOME=Installation drive:\Middleware\Oracle_BI1
set PATH=%ORACLE_HOME%\bin;%PATH%
set JAVA_HOME=%ORACLE_HOME%\jdk
set PATH=%JAVA_HOME%\bin;%PATH%
set PATH=%ORACLE_HOME%\OPatch;%PATH%
Go to 16453010 folder path using “cd 16453010” command as shown in below screen
 Then type “opatch apply” in side of the 16453010
If it is succeed, then will get message like “Opatch Succeeded”as shown in below screen


Now we have successfully done patching for 16453010. Similarly do patching for other 5 files also (16842070, 16849017, 16850553, 16869578, 16916026)
Example: Come back from the 16453010 folder and go to 16842070 folder and run the “Optach apply” command in 16842070


Saturday, October 26, 2013

OBIEE 11.1.1.7 Installation steps


Once the RCU(Repository Utility Creation) ran has successfully completed then start OBIEE11.1.1.7.0 Installation
1. Double Click on setup.exe file under Extracted_Directory Path\Disk1 and follow the below steps to install the OBIEE11.1.1.7.0

2. Select “Skip Software Updates” and Click on NEXT
 
3. Select Enterprise Install and Click on NEXT

 4. Wait Until Prerequisite completed 100% successfully then click on NEXT
5. Select Create New BI System and give the username, Password, Confirm Password and Domain Name


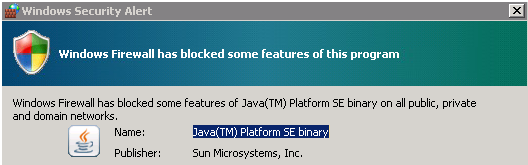
6. Any popup like shown as in the below, Click on Yes

 
Select Oracle Middleware Home location, Domain Home Location, Oracle Instance Location and Click On NEXT
7. Select the needed Components to configure. Here we are selecting Business Intelligence Enterprise Edition and Business Intelligence Publisher

8.       Provide the BI_PLATFORM schema Connection Details
Note: While running RCU we have created 2 schemas  BI_PLATFORM  and MDS.
provide the connection string Name, BI_PLATFORM Schema username and Password

 
9.       Enter the MDS Schema Details: Connection String, MDS Schema Username and Password

10.       Any Popup like as shown in the below, Click on Allow access
If we are selecting Auto Port it will take default port or else If we need to Change ports select Specify Ports using Configuration file (Provide the port Details in “ini” file and browse staticports.ini file)

11.       Click on Yes and Next
 
12. Click on Save to Save the Installation Details

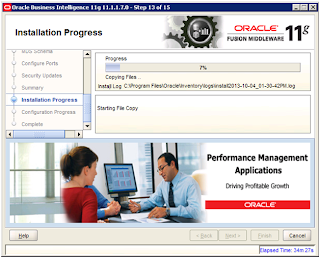
Click on “Install”
13.       Installation process has complete  100% then Click on NEXT
 
14.  Check the BI Configuration status then Click on NEXT
 
15. Click on SAVE button to save the Configure Component Details

Click on “FINISH”