Saturday, October 26, 2013

OBIEE 11.1.1.7 Installation steps


Once the RCU(Repository Utility Creation) ran has successfully completed then start OBIEE11.1.1.7.0 Installation
1. Double Click on setup.exe file under Extracted_Directory Path\Disk1 and follow the below steps to install the OBIEE11.1.1.7.0

2. Select “Skip Software Updates” and Click on NEXT
 
3. Select Enterprise Install and Click on NEXT

 4. Wait Until Prerequisite completed 100% successfully then click on NEXT
5. Select Create New BI System and give the username, Password, Confirm Password and Domain Name


6. Any popup like shown as in the below, Click on Yes

 
Select Oracle Middleware Home location, Domain Home Location, Oracle Instance Location and Click On NEXT
7. Select the needed Components to configure. Here we are selecting Business Intelligence Enterprise Edition and Business Intelligence Publisher

8.       Provide the BI_PLATFORM schema Connection Details
Note: While running RCU we have created 2 schemas  BI_PLATFORM  and MDS.
provide the connection string Name, BI_PLATFORM Schema username and Password

 
9.       Enter the MDS Schema Details: Connection String, MDS Schema Username and Password

10.       Any Popup like as shown in the below, Click on Allow access
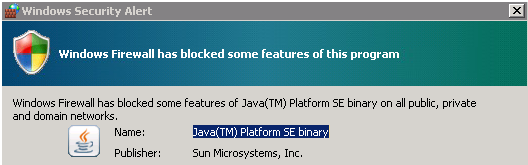
If we are selecting Auto Port it will take default port or else If we need to Change ports select Specify Ports using Configuration file (Provide the port Details in “ini” file and browse staticports.ini file)

11.       Click on Yes and Next
 
12. Click on Save to Save the Installation Details

Click on “Install”
13.       Installation process has complete  100% then Click on NEXT
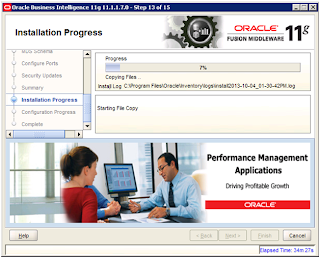
 
14.  Check the BI Configuration status then Click on NEXT
 
15. Click on SAVE button to save the Configure Component Details

Click on “FINISH”


Wednesday, October 16, 2013

OBIEE11.1.1.7 RCU Run

Extract and then run the ...\RCU\rcuHome\BIN\rcu.bat file


Click on next to create Repository.


Select the radio button create and then click on next.

 
Enter the Hostname, Port, Service Name details for database  


Note: Check the same boxes as in the screen shot(Metadata Services in AS Common Schemas and Business Intelligence Platform in Oracle Business Intellegence).
Select the radio button Create a New Prefix and enter the value as “Text” and click on next.


Checking Component Prerequisites  (Metadata Services and Business Intelligence Platform). Click on OK
 
Check the radio button Use same passwords for all schemas and enter the password
 

Click on Next


To create Tablespaces Click on OK
 
Validating and creating tablespaces in repository database

Click on create

Click on close. Now RCU ran successfully once we got the above screen


Tuesday, September 10, 2013

Creating Hierarchy in Tableau


1.       Select the columns on which columns you want to create hierarchy and right click then select the “Create Hierarchy” option.
Eg: Here we are selecting Market, Product, Product Type
2.       Give the name of Hierarchy

Product Hierarchy is created .
 
3.       Drag and drop Market column into Columns and Sales column into Rows 
4.       Navigate from Market -> Product Type -> Product by clicking “+” symbol.
5.       If we want to come back from navigation detail to summary, use “-” symbol.